Why Elementor Can’t Display ACF Repeater Fields Natively
You built the repeater. You filled in the rows. You opened Elementor, clicked the dynamic tag icon expecting to find your field — and it’s not there.
You check the field name. Correct. You check the location rule. Correct. You clear the cache, reload the editor, try a different widget. Still nothing.
Nothing is broken. Elementor just can’t do it.
Here’s why, in plain terms.
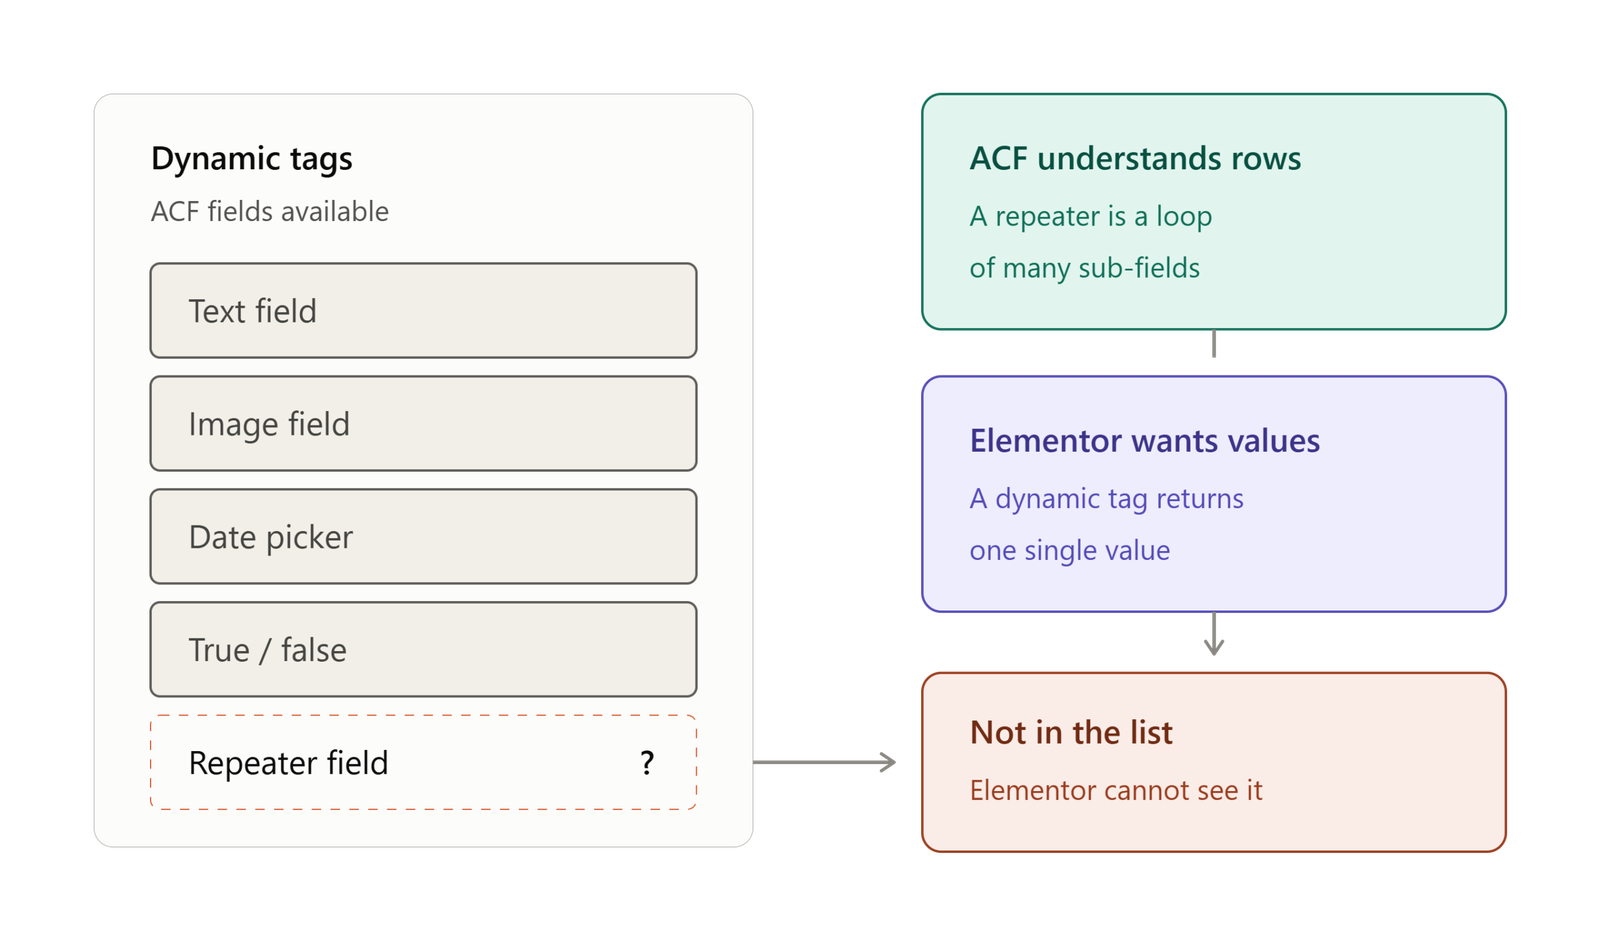
Elementor’s dynamic tags are built to fetch one thing. One heading, one image, one link. Ask for a text field, get a text field. Simple.
A repeater isn’t one thing. It’s a list. Four team members, six pricing plans, ten testimonials — each with its own image, its own name, its own text. To show it, something has to walk through that list and build a card for each item.
Elementor has no way to walk through a list. So it just… doesn’t offer you the field. No error, no warning. It’s simply not in the dropdown.
You’re using a page builder, and you just built a section you can’t edit in the page builder.
There’s a better way. It takes about five minutes and no code at all.
What You Need
Three plugins:
- Elementor Pro — required. The plugin is built on Elementor’s dynamic tags system, which is a Pro-only feature.
- Advanced Custom Fields Pro — required. The repeater field is a Pro-only field type.
- AddonCraft Repeater for Elementor — free on the WordPress.org plugin repository.
Install and activate all three before continuing.
Why Pro on both? Repeater fields don’t exist in free ACF, and dynamic tags don’t exist in free Elementor. This plugin sits between the two — it needs both to be present.
Step 1: Create Your ACF Repeater Field
We’ll build a team member section — a common use case that maps cleanly to a repeater.
Create a new field group and add a repeater field. In this example the repeater is named Team Member, with three sub-fields:
| Sub-field | Field type | Field name (slug) |
|---|---|---|
| Image | Image | image |
| Name | Text | name |
| Designation | Text | designation |
Set the field group’s location rule to display on the page where the team section will live — for example, Page is equal to Team.
Save the field group.
Write down your field names. You’ll reference the sub-field slugs (
image,name,designation) exactly when you wire up dynamic tags in Step 4. The Field Name is the slug — not the Field Label.
Step 2: Add Your Content
Open the page you targeted with the location rule. The repeater now appears in the WordPress editor below the content area.
Add your rows — upload an image, type a name, type a designation. Repeat for each team member. In this example, four.
Save the page.
Now preview the page. Nothing appears.
That’s expected, and it’s the moment most people get stuck. The data is sitting in the database, but nothing is rendering it. That’s Elementor’s job — and that’s Step 3.
Step 3: Add the Repeater Widget in Elementor
Click Edit with Elementor on that page.
In the widget panel, search for Repeater. Drag the AddonCraft Repeater widget onto the canvas.
The widget displays a message: “Please select a template in the widget settings.”
Open the widget’s Content tab. You’ll find a Repeater Field dropdown. This is where you tell the widget which ACF repeater to loop through.
Select Team Member.
Step 4: Build the Loop Template
Below the field selector, click Add Template. Elementor’s template editor opens.
Here’s the key concept: you are designing one single row of the repeater. The widget takes that template and repeats it once for every row in your ACF data. Build one card — get four.
Add the image
Drag in an Image widget. Instead of uploading a static image, click the dynamic tag icon (the small database icon next to the image control).
In the dynamic tag list, find the AddonCraft Repeater group and select ACF Repeater Image.
Now click the gear (settings) icon on the dynamic tag. A field appears where you enter the sub-field name. Type image.
The image now pulls from the current repeater row.
Add the name
Drag in a Heading widget. Click its dynamic tag icon → AddonCraft Repeater → ACF Repeater → gear icon → enter the sub-field name name.
Add the designation
Drag in a Text Editor widget (or a second Heading — your call). Same process: dynamic tag → AddonCraft ACF Repeater → gear icon → designation.
Style it
Style the card however you like. Padding, typography, borders, box-shadows, hover effects, responsive breakpoints — every Elementor styling control works normally, because this is a genuine Elementor template, not shortcode output.
This is the entire advantage over the shortcode method.
Name and save
Rename the template to something meaningful — Team Template — and click Publish.
Step 5: Return to the Page and Publish
Go back to your page in Elementor. The Repeater widget now renders all four team members, each one built from the template you just designed.
Hit Publish and view the page on the front end. Your ACF repeater data is live, styled, and fully editable in Elementor.
Layout Controls: Columns and Gap
The widget includes a Layout section with two controls that handle the part you’d otherwise hand-write as CSS grid:
- Columns — set 2, 3, or 4 columns
- Gap — increase or decrease the spacing between items
Change the column count and the grid reflows instantly in the editor. No CSS. No flexbox debugging.
Beyond Team Sections: Other Use Cases
A team grid is the easiest thing to demo, but the same pattern applies to any repeating content structure:
| Use case | Repeater sub-fields |
|---|---|
| Pricing tables | Plan name, price, feature list, CTA link |
| Testimonials | Photo, quote, author, company |
| FAQ sections | Question, answer |
| Product loops | Image, title, price, link |
| Service cards | Icon, title, description |
| Portfolio grids | Thumbnail, project name, category |
| Logo walls | Logo image, company name, link |
| Event listings | Date, title, location, ticket link |
Anywhere you’d normally build a repeater and then dread writing the shortcode — this replaces it.
ACF Repeater in Elementor: Shortcode vs. Plugin
| Shortcode method | AddonCraft Repeater | |
|---|---|---|
| Requires PHP | Yes | No |
| Visual styling in Elementor | No | Yes |
| Responsive controls | Manual CSS | Built-in |
| Column layout | Manual CSS grid | Dropdown control |
| Editing after launch | Code editor | Elementor editor |
| Client can maintain it | No | Yes |
| Time to build | 30–60 min | 5 min |
Frequently Asked Questions
Do I need Elementor Pro?
Yes. Dynamic tags are an Elementor Pro feature, and the entire plugin is built on top of them. The free version of Elementor won’t work.
Do I need ACF Pro?
Yes. The repeater field is a Pro-only field type in Advanced Custom Fields.
Can I use nested repeaters?
The widget targets the sub-fields of a single repeater level. Deeply nested repeaters are not the intended use case.
Do I still need to write PHP or shortcodes?
No. The loop, the dynamic tags, and the layout are all handled through the Elementor interface.
Where do I find the sub-field name?
In your ACF field group editor, each sub-field has a Field Name (the slug, e.g. designation) separate from its Field Label (e.g. “Designation”). Use the Field Name in the dynamic tag settings.
Can I style each repeater item differently?
The template renders identically for every row. For conditional styling, add a sub-field (such as a select field) and use its value to drive a CSS class.
Why doesn’t my ACF repeater show up in Elementor’s dynamic tags?
Because Elementor’s native dynamic tags only support single-value fields, not arrays. Repeater fields require a loop, which Elementor doesn’t provide natively. That’s the gap this plugin fills.
Does this work with WooCommerce products?
Yes — if the repeater field is attached to the product post type, the widget can loop it on the product template.